In WordPress, a slug is the part of a permalink that identifies a specific post, page, or term. It is used within a permalink, but it is not the same as the permalink itself. A permalink contains the full URL address, while the slug is only the unique identifying part.
WordPress automatically creates slugs based on the title of the content you publish. As part of that process, each slug is cleaned up and standardized, which is why slugs are lowercase and hyphenated by default.
In this article, you will learn the difference between slugs and permalinks, how WordPress generates slugs, and how they can be managed inside the admin dashboard.
Key Takeaways
- The slug is generated automatically from the initial title. Once a post or term is published, the slug stays the same, even if you change the title later. This prevents unnecessary URL changes that could hurt your SEO or confuse visitors.
- By default, WordPress allows you to edit only the slug generated from the title. To modify any other part of the permalink structure, you need to implement custom permalinks.
- Changing a slug also changes the permalink (URL). If you update a slug, make sure the previous URL redirects to the new one to prevent broken links.
Slug vs. Permalink: What's the Difference?
The terms "permalinks" and "slugs" are often used interchangeably, but they have different meanings and should not be confused:
- The permalink is what the visitor sees and what search engines index.
- The slug is the final part of that URL. It identifies the specific post, page, or term within your site.
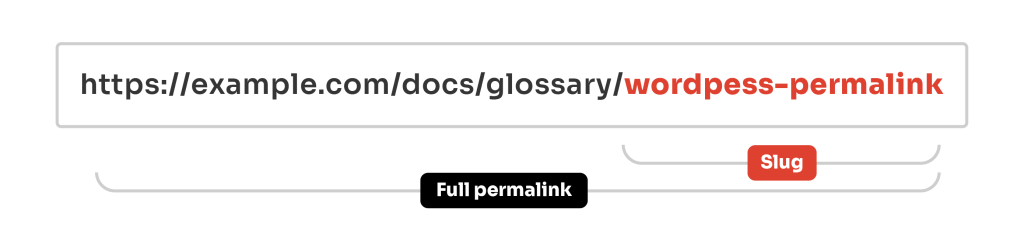
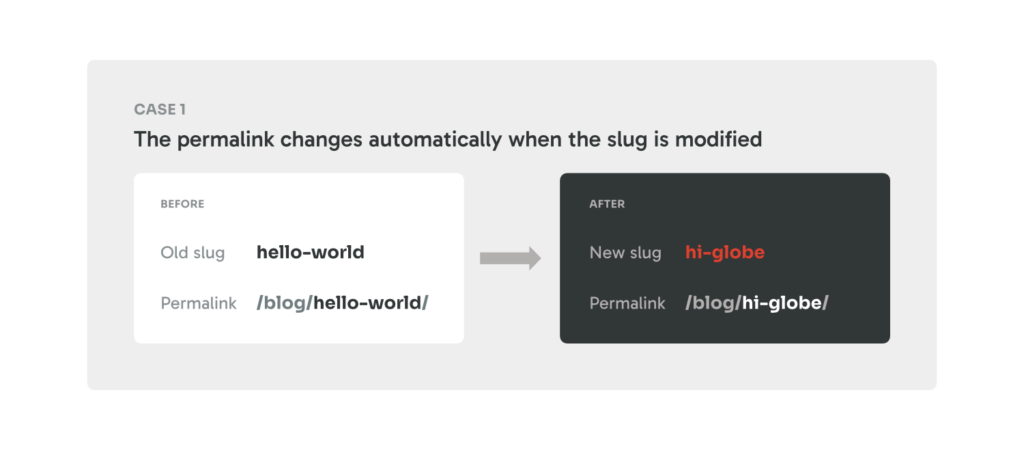
example.com/?page_id=123 rather than example.com/hello-world).When using standard permalink settings that include slugs, changing a slug will also change the permalink. For example, if you edit a post or page slug and change it from "hello-world" to "hi-globe", the permalink is updated automatically to match the new slug.
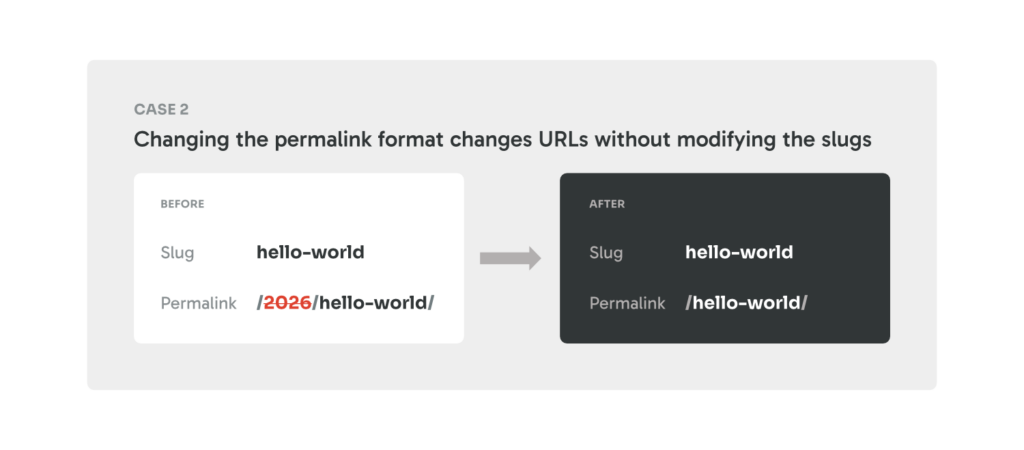
However, it is possible to change a permalink without changing the slug. This may happen when you update the permalink structure, for example, by removing the date from blog post URLs. It can also happen when using custom permalinks, such as replacing slugs with post or term IDs.
How WordPress Generates Slugs
After you publish a post, page or category, WordPress derives the slug from the title using the built-in sanitize_title() function, which in turn calls remove_accents(). Together they:
- convert every character to lowercase,
- replace spaces with hyphens,
- strip out punctuation and other non-alphanumeric characters,
- convert accented Latin letters to their plain ASCII equivalent (for example,
cafébecomescafe).
Non-Latin scripts, including Cyrillic, Greek, and Arabic, are handled differently. Instead of being transliterated, these characters are preserved and percent-encoded in the URL.
WordPress also guarantees that no two published items of the same type share a slug. If the sanitized slug already exists, it appends a numeric suffix (-2, -3, and so on) through the wp_unique_post_slug function.
How to Reset a Slug
After a post is published, WordPress keeps its slug unchanged, even if the post title is edited later. This behavior is intentional. Changing a URL can break existing links, affect search engine visibility, and lead visitors to 404 error pages.
For a small number of slugs, you can regenerate them manually using the methods described in the next section. To do this, clear the slug field instead of modifying its value, then save the post. WordPress will generate a new slug from the current title.
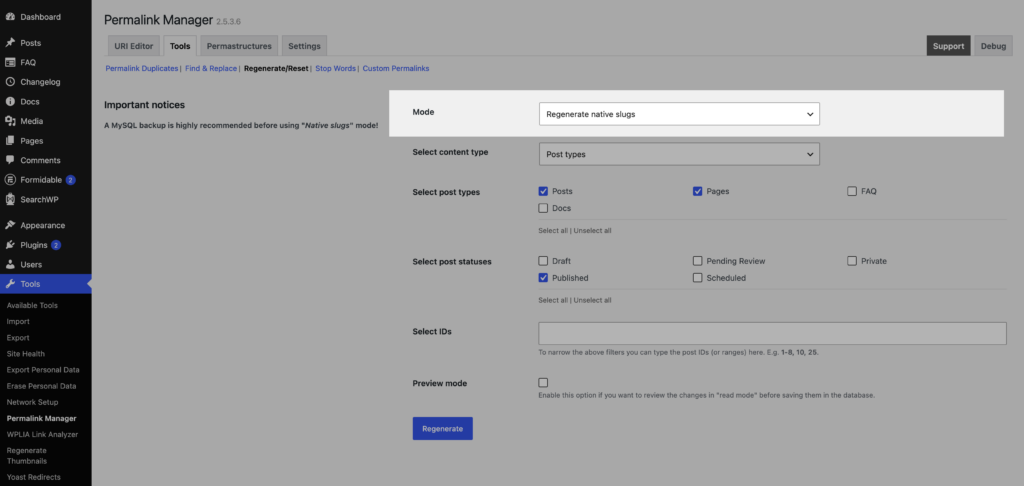
If you need to regenerate slugs for a larger number of posts or terms, you can use Permalink Manager's "Tools → Regenerate/Reset" section and choose the "Regenerate native slugs" option.
Why WordPress Locks Other Parts of the Permalink
Everything in a permalink that appears before the slug, such as a custom taxonomy or custom post type prefix (for example, /product/ and /product-category/ in WooCommerce URLs), is generated automatically based on the global permalink structure.
This fixed part is what allows WordPress to distinguish one content type from another, and every content type is expected to have its own format for whatever comes before the slug.
Assigning the same structure to multiple content types can result in permalink conflicts. When that happens, WordPress may not be able to tell which content type a URL belongs to, and the request returns a "404" error instead.
To avoid these conflicts, WordPress limits full permalink customization and allows changing only the slug by default.
How to Edit a Slug in WordPress
If you need to update a slug, you can do so in three ways: through the WordPress admin dashboard, programmatically using native PHP functions, or directly in the database with SQL.
Whichever method you choose, make sure the previous URL redirects to the new one. Built-in canonical redirect do not always handle every case. If necessary, use a dedicated redirection plugin or configure redirects at the server level.
Editing Slugs From the Admin Dashboard
Classic Editor
If you are using the Classic Editor, you can change the slug by clicking the small "Edit" button just below the title.


Gutenberg (Block) Editor
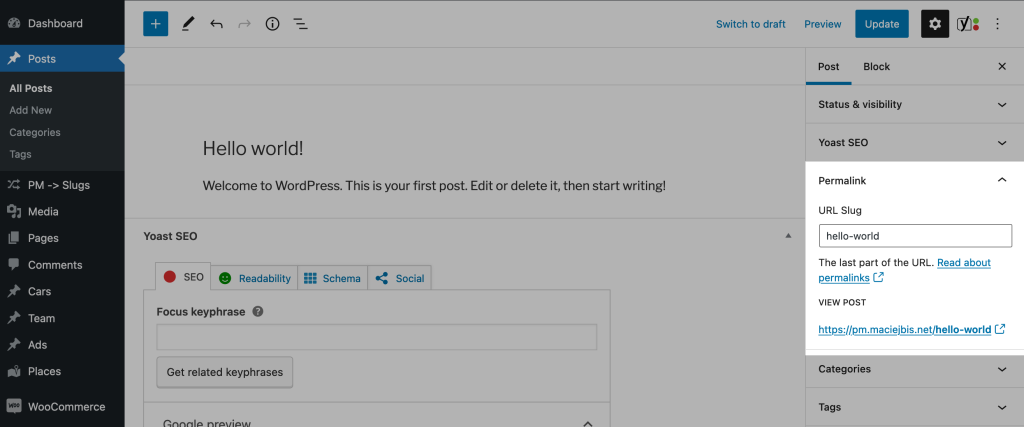
To change a slug in Block Editor (Gutenberg), use to the "Permalink" section in the sidebar.
Categories and Custom Taxonomies
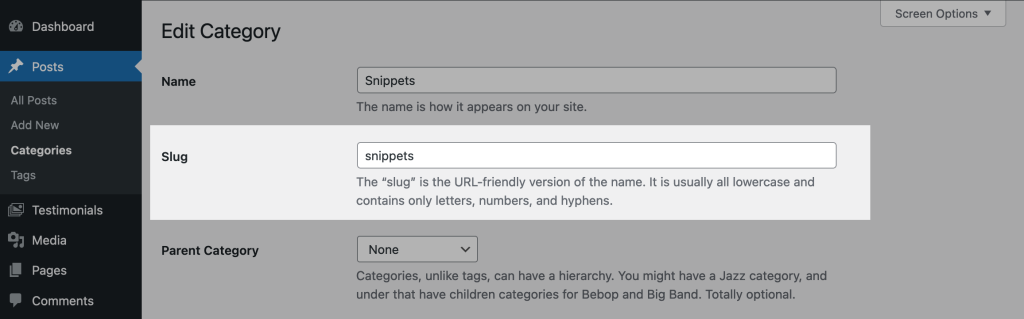
When editing categories, tags, or custom taxonomy items in WordPress, the slug field is available on the same page where you can change the title/name.
Via "Quick Edit"
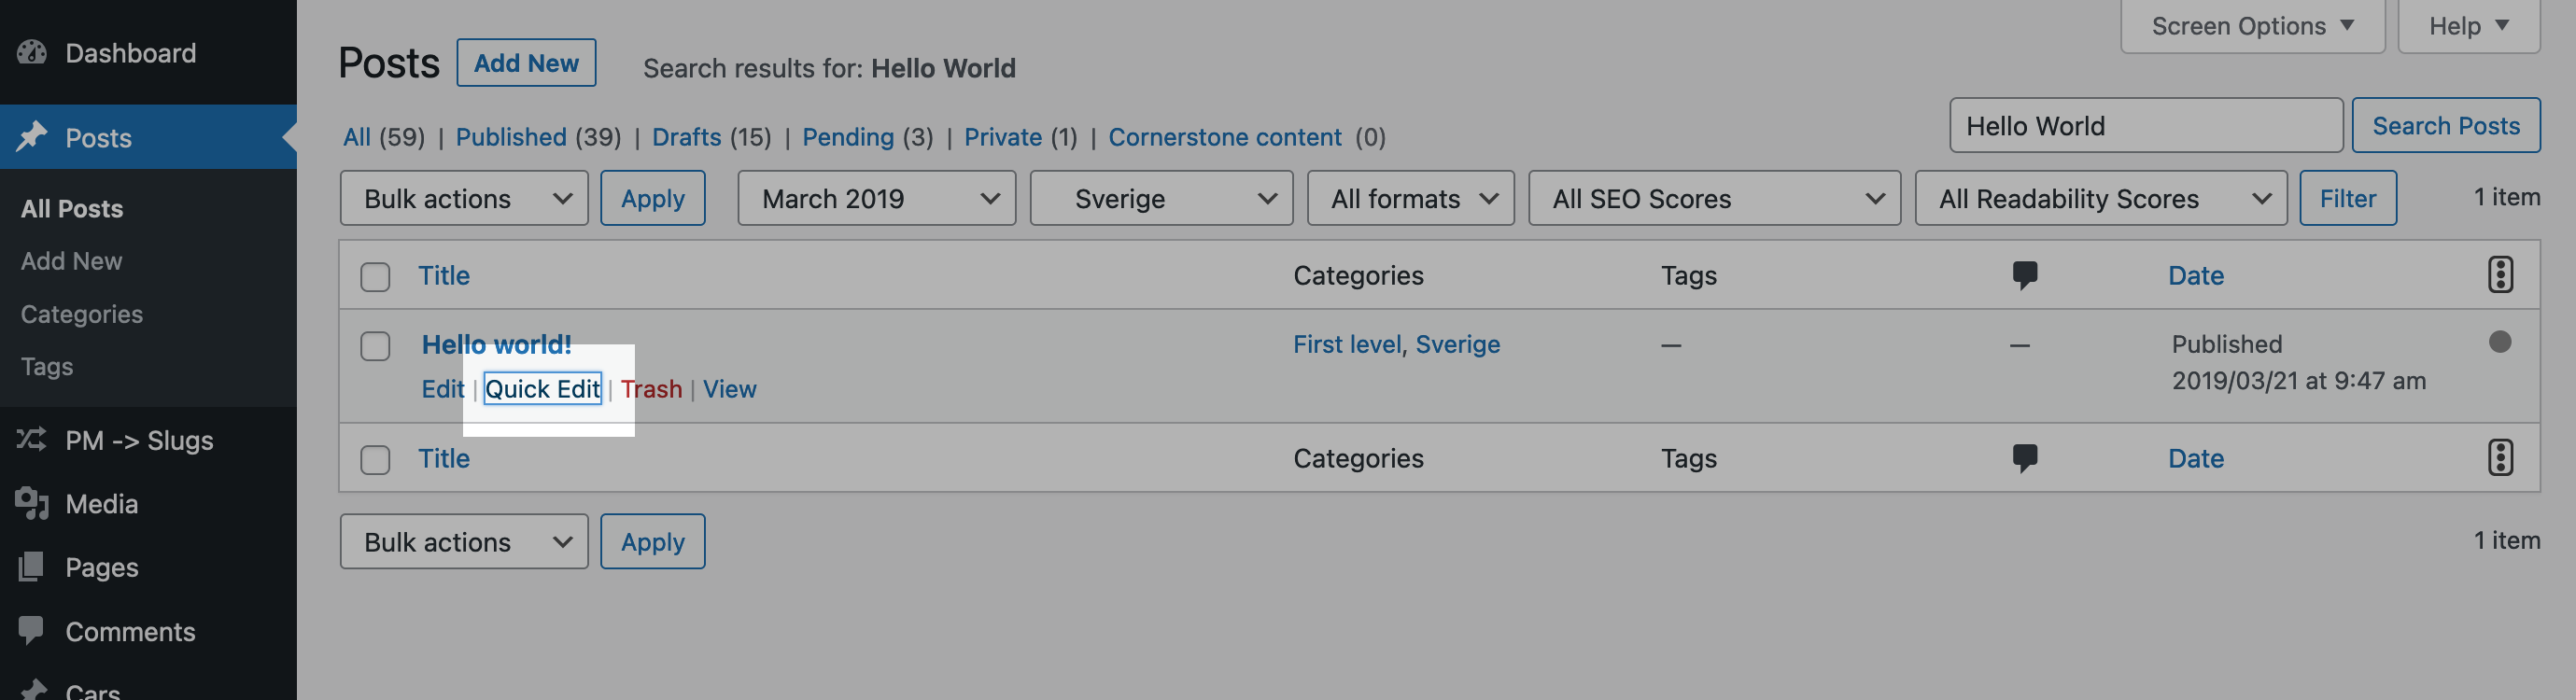
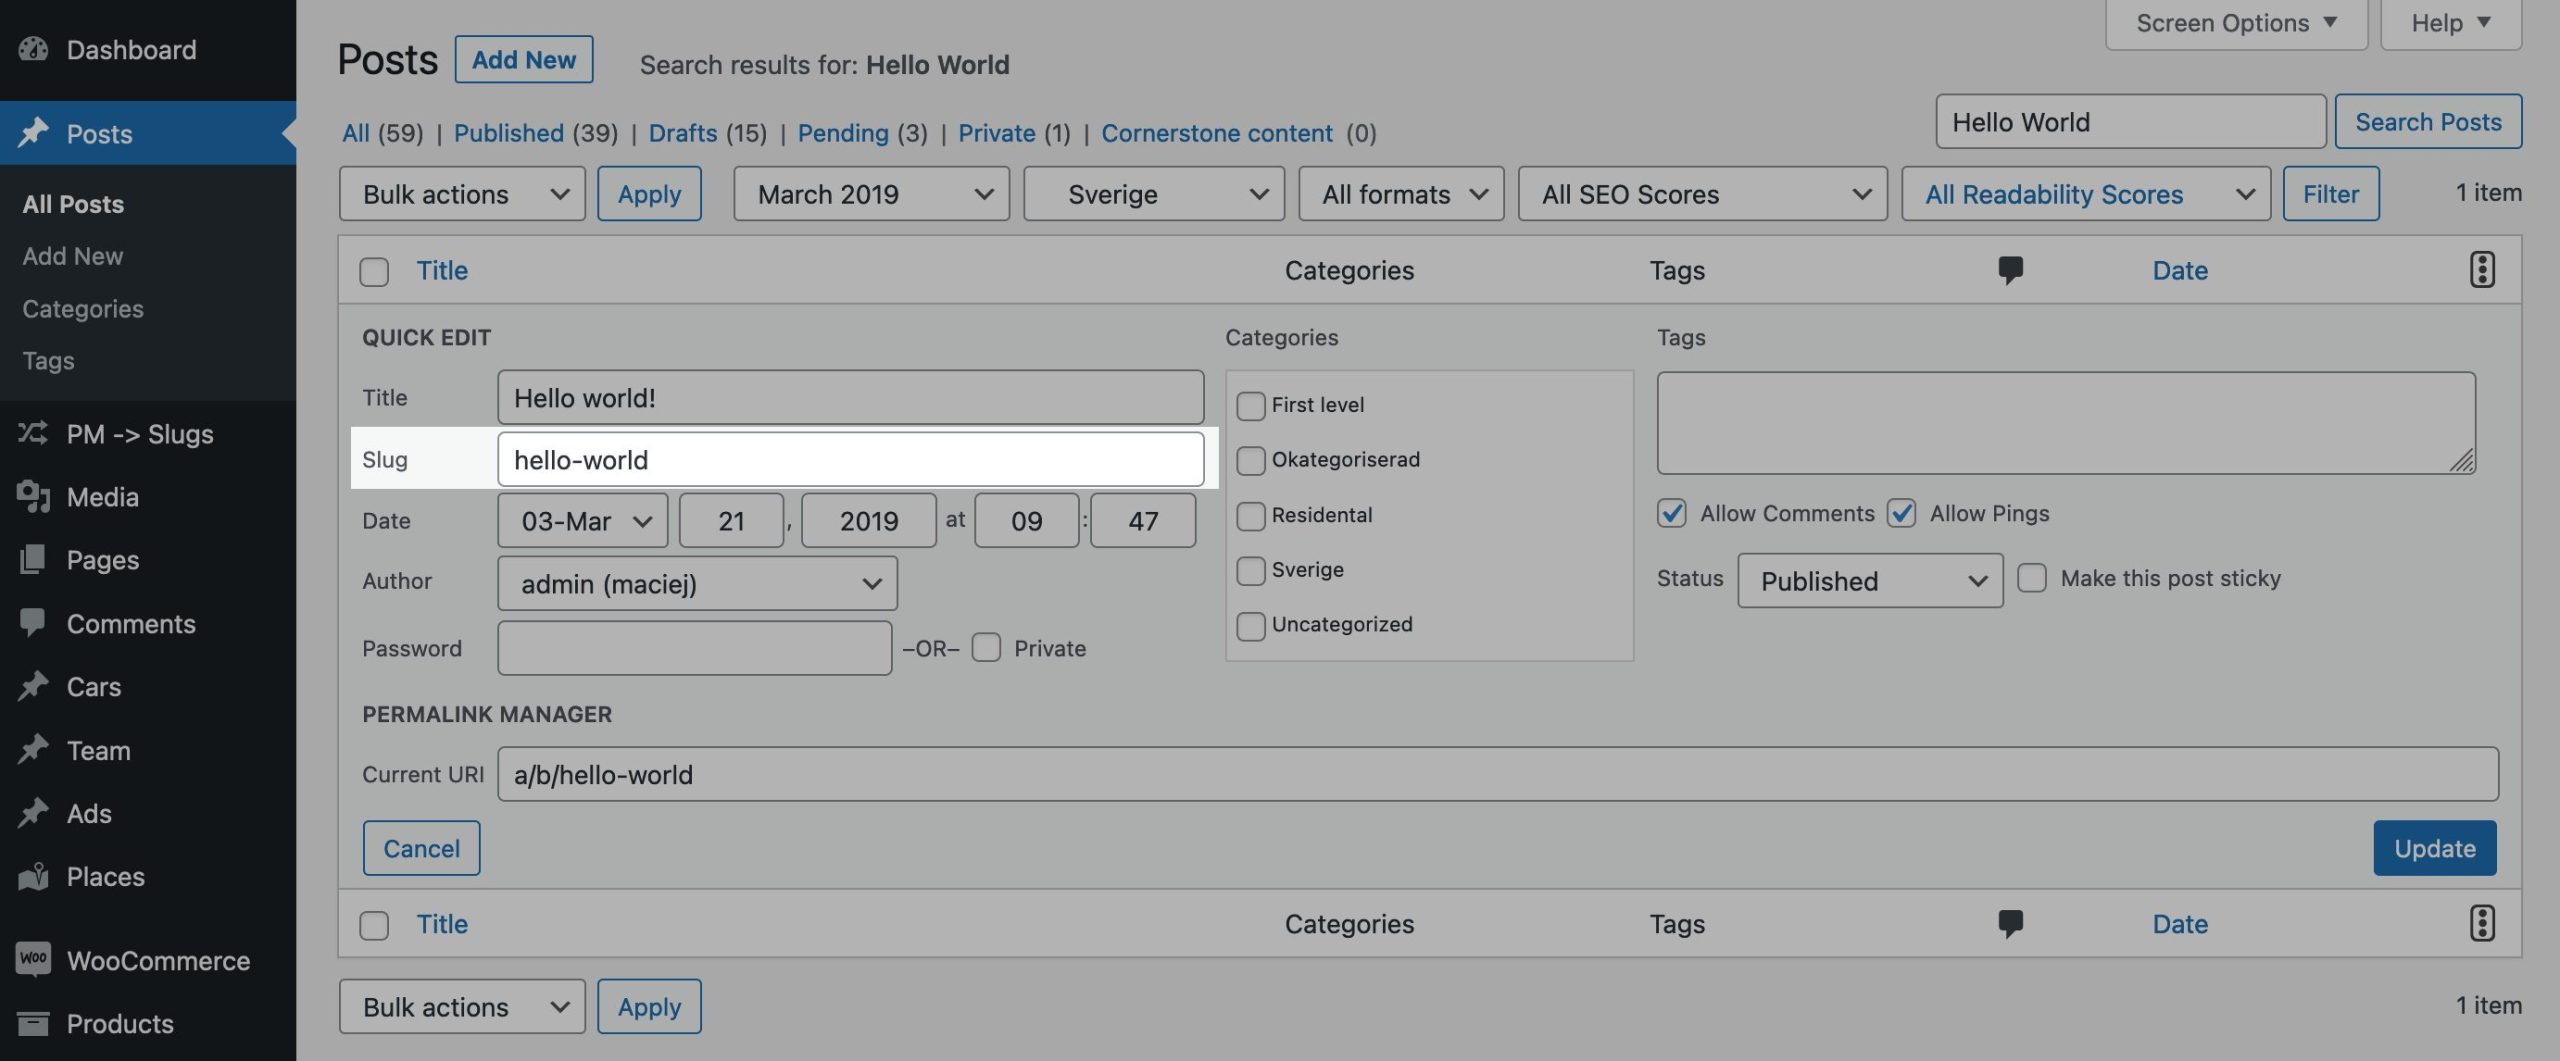
You can also change the slug of a post or term without opening the full editor. In the posts or categories list, click the "Quick Edit" link beneath the title. An input field will appear where you can edit the slug directly.
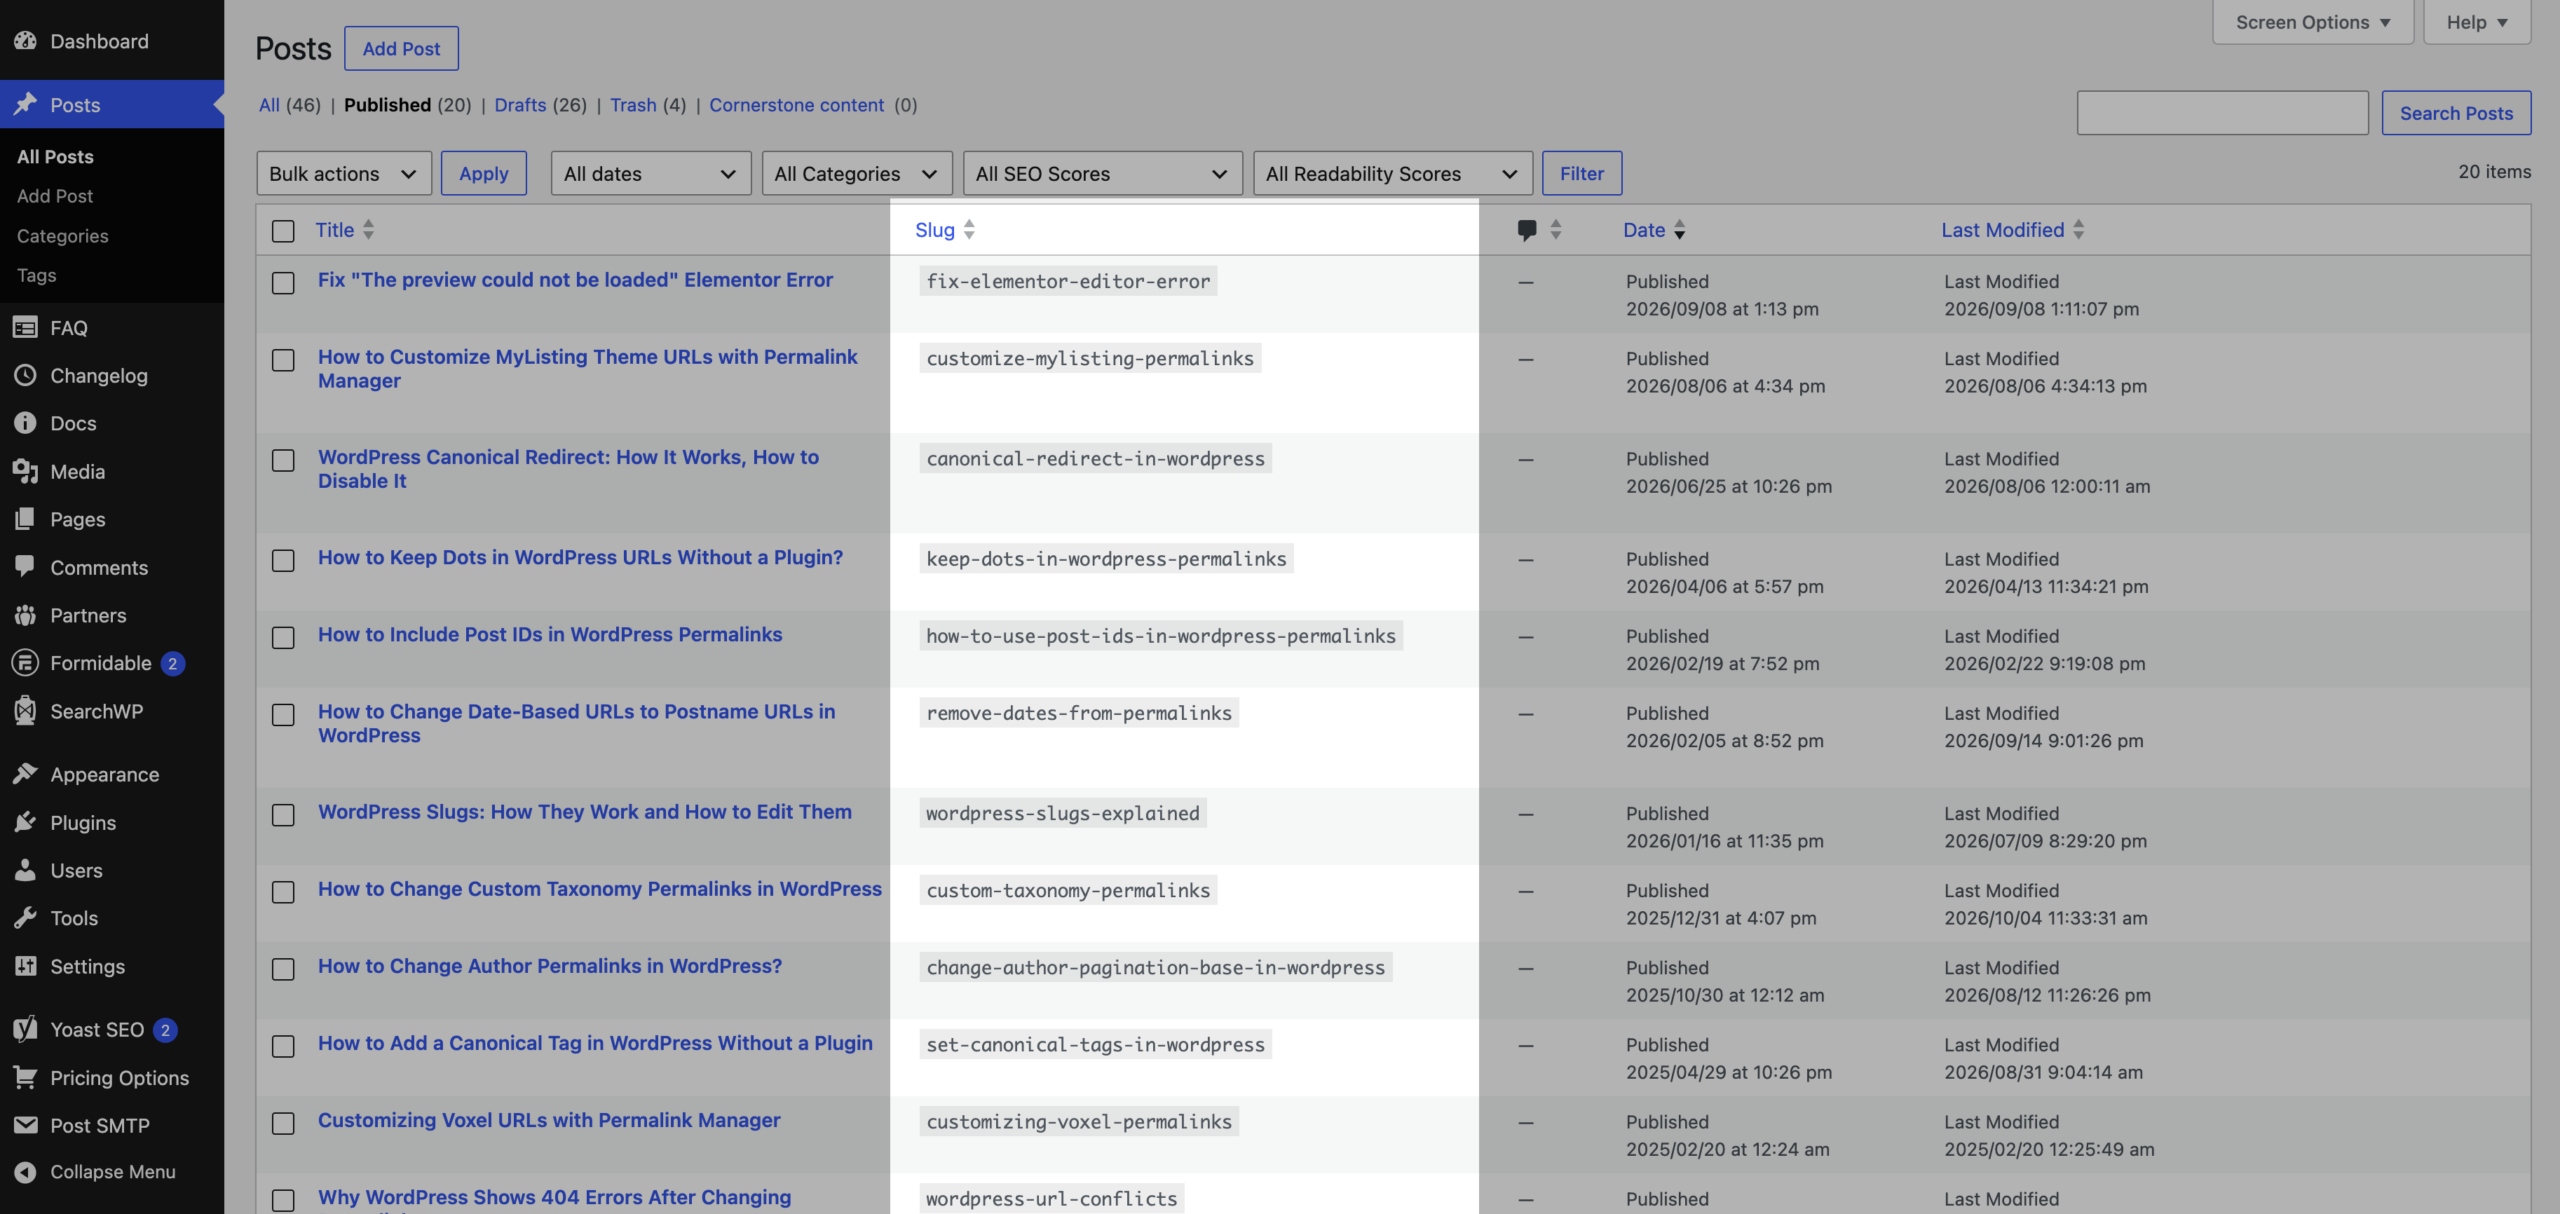
You can also display the slug directly in the posts list by adding a Slug column to the posts list, which makes it easier to check multiple slugs without opening each item.
Editing Slugs in the Database (SQL)
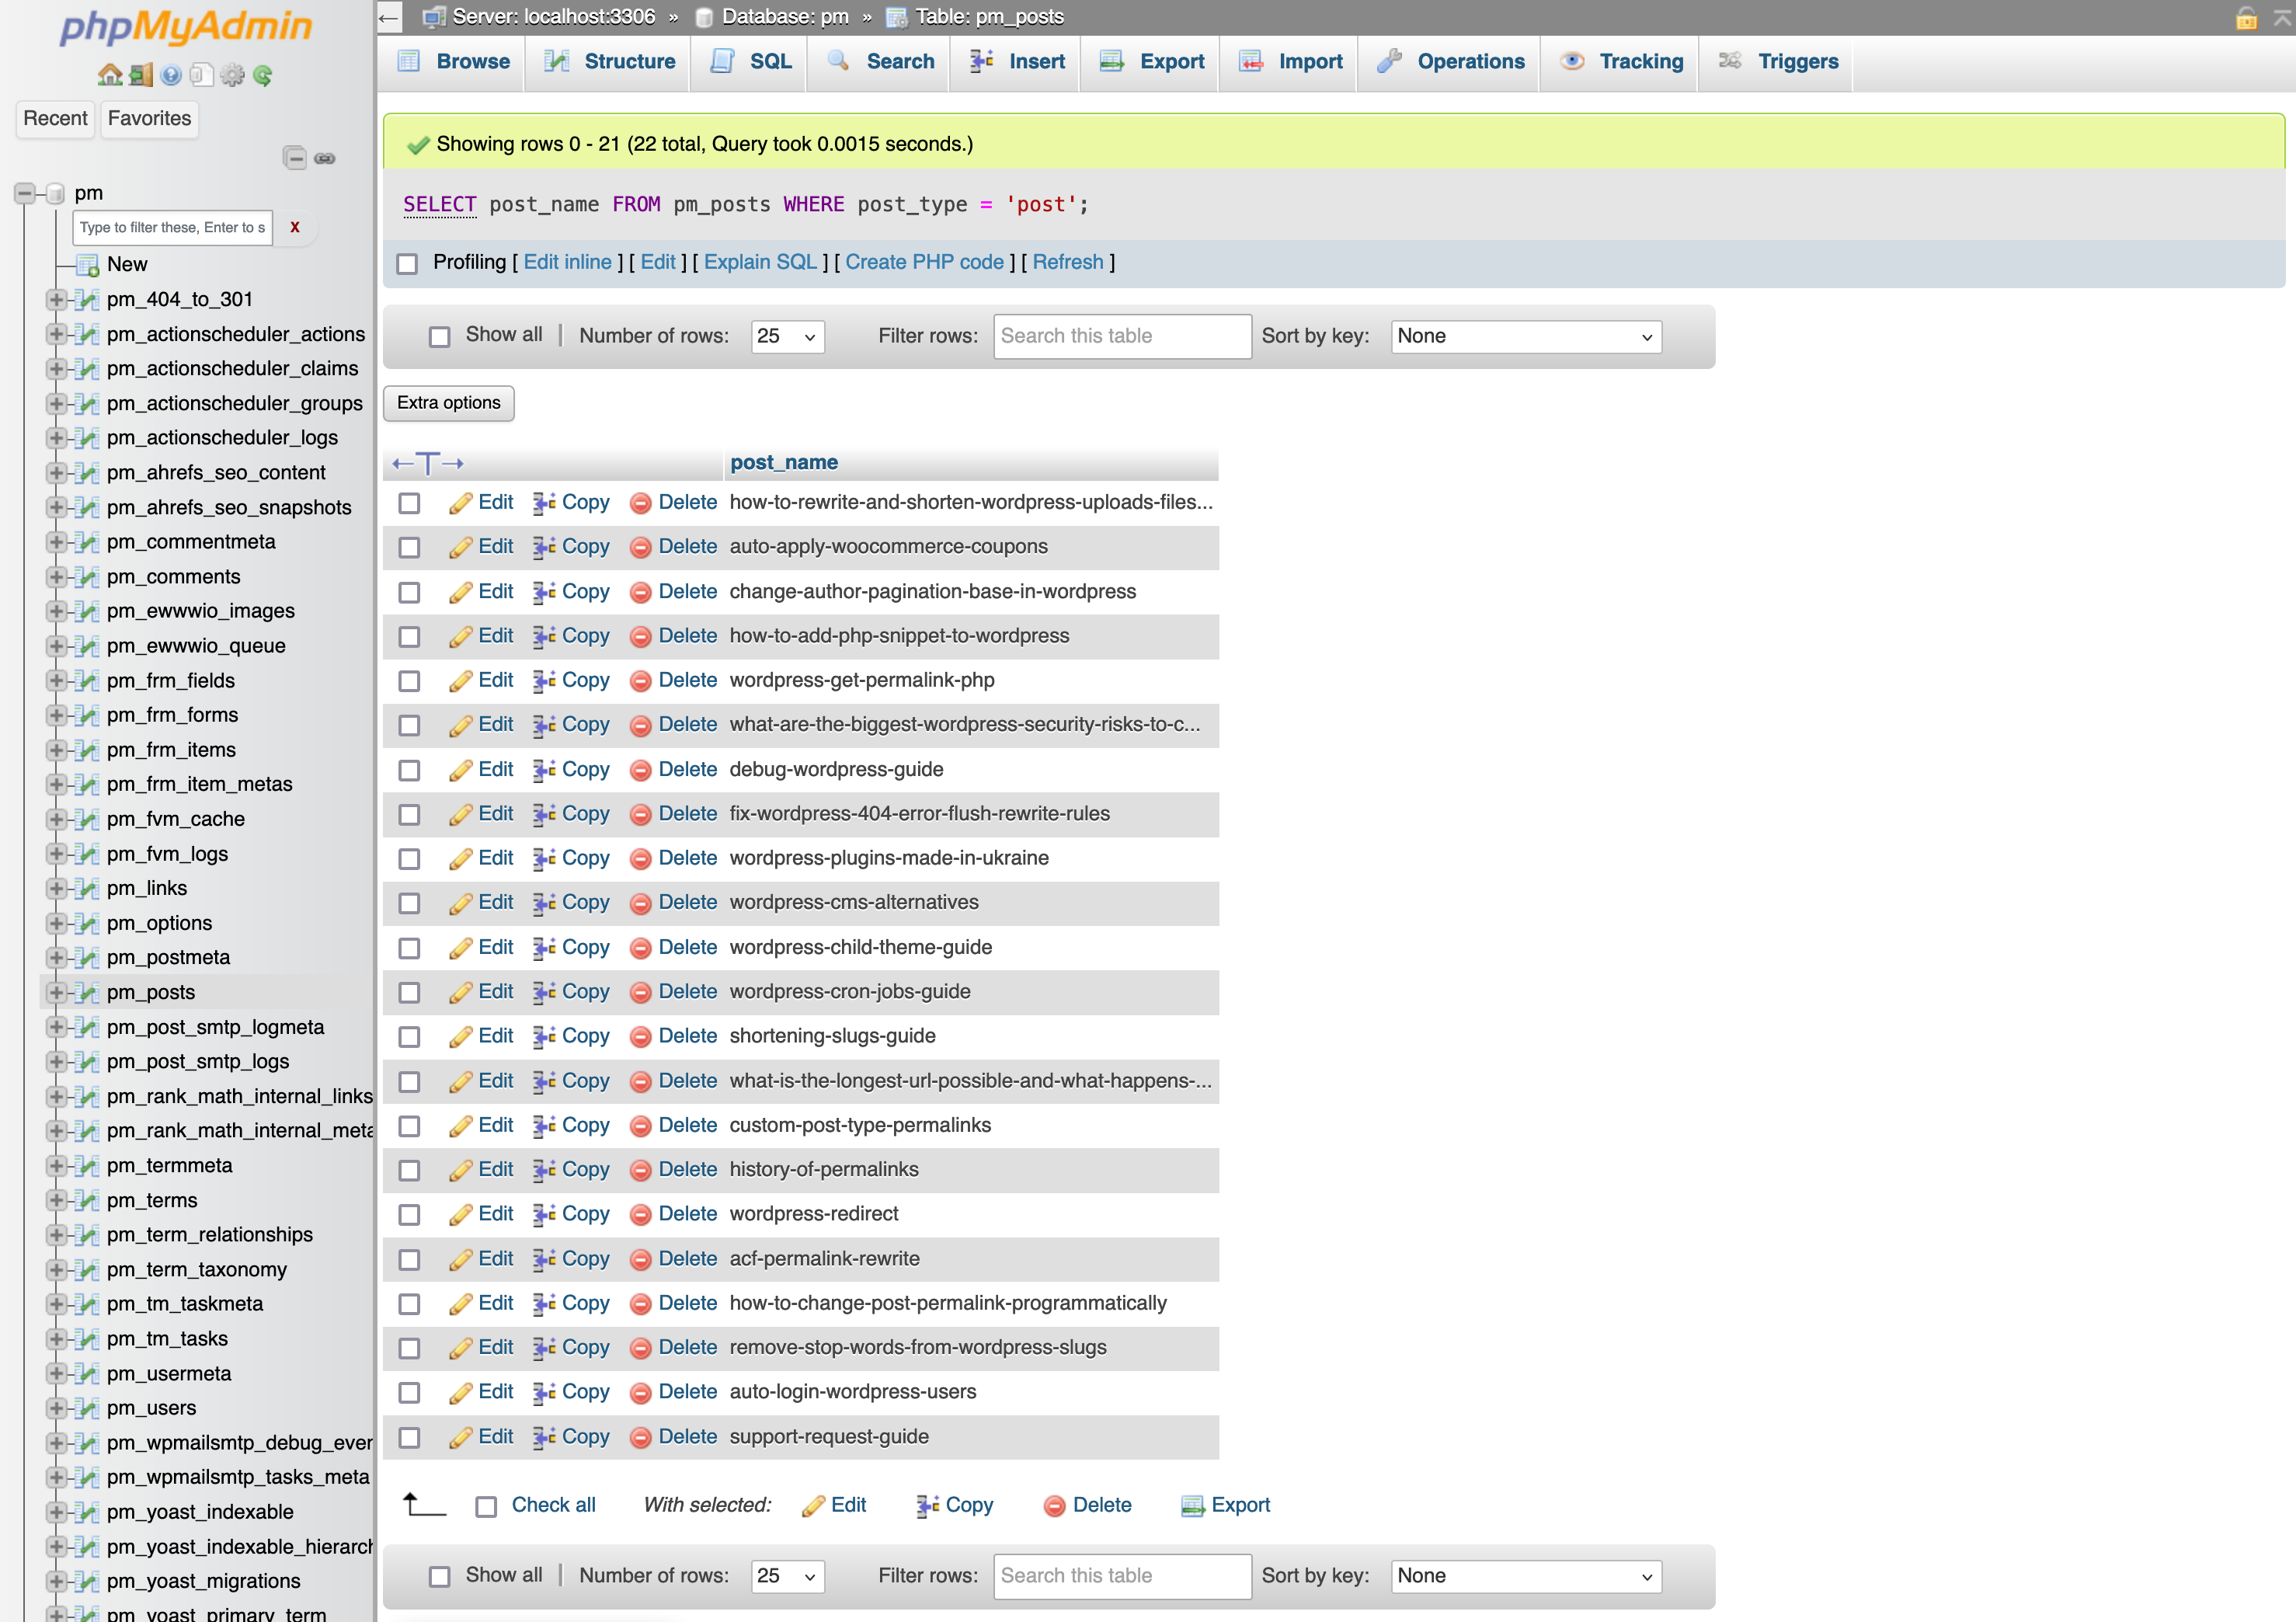
You can modify slugs not only from the admin interface, but also directly in the database if your workflow requires it. However, this method is not recommended, as it bypasses the sanitize_title() function used by WordPress to clean and standardize slugs.
To change the slugs this way, you will need to edit them directly in their dedicated columns. The column name depends on the type of content being modified:
- For posts, pages, and custom post types, the slug is saved in the "post_name" column of the
wp_poststable. - Categories, tags, and other taxonomy terms store their slugs in the "slug" column of the
wp_termstable.
Editing Slugs With PHP (WordPress API)
WordPress does not include a separate function for updating post slugs only. The most convenient method is to use the wp_update_post() function and update the post_name value:
wp_update_post( array( 'ID' => $post_id, 'post_name' => $new_slug ) );To change the slug of a term, such as a category, use the wp_update_term() function:
wp_update_term( $term_id, $taxonomy, array( 'slug' => $new_slug ) );Both functions are used throughout WordPress core and by many plugins. When implemented as shown below, WordPress takes care of the rest. The modified slug still passes through WordPress's built-in cleaning and sanitization steps.
Auto-Updating Slugs on Title Change
You can pair these functions with the post_updated and edited_term hooks to regenerate the slug whenever a title is changed. This allows WordPress to update the slug automatically, which is not available by default.
function pm_update_post_slug_on_title_change( $post_id, $post_after, $post_before ) {
	if ( $post_after→post_type == 'post' && $post_after→post_title !== $post_before→post_title ) {
		$new_slug = sanitize_title( $post_after→post_title );

		// Skip if the slug is already correct — prevents the loop.
		if ( $post_after→post_name === $new_slug ) {
			return;
		}

		wp_update_post( array(
			'ID' => $post_id,
			'post_name' => $new_slug,
		) );
	}
}
add_action( 'post_updated', 'pm_update_post_slug_on_title_change', 9, 3 );
For categories and custom taxonomies, use the edited_term hook instead.
function pm_update_category_slug_on_name_change( $term_id, $tt_id, $taxonomy ) {
	if ( $taxonomy == 'category' ) {
		$term = get_term( $term_id, $taxonomy );

		if ( ! is_wp_error( $term ) ) {
			$new_slug = sanitize_title( $term→name );

			// Skip if the slug is already correct — prevents the loop.
			if ( $term→slug === $new_slug ) {
				return;
			}

			wp_update_term( $term_id, $taxonomy, array(
				'slug' => $new_slug,
			) );
		}
	}
}
add_action( 'edited_term', 'pm_update_category_slug_on_name_change', 10, 3 );
Changing How WordPress Generates Slugs with Filter Hooks
If you need to modify how WordPress generates native slugs, the simplest approach is to use the wp_unique_post_slug and wp_unique_term_slug filter hooks.
The code snippets below show how to use these filters to limit slug length or remove specific "stop" words, resulting in shorter URLs.
Please note that these snippets apply only to new slugs generated for new items. By default, they do not change existing slugs retroactively. To update those, you can reset them manually or with Permalink Manager.
Limit the Number of Words in a Slug
function pm_slug_limit_words( $slug, $post_id ) {
	// The new slug's max. word count can be changed below
	$max_words = 4;

	if ( is_numeric( $post_id ) ) {
		$post = get_post( $post_id );

		// Stop if the slug for this post was already generated
		if ( ! empty( $post→post_name ) ) {
			return $slug;
		}

		if ( ! empty( $slug ) && substr_count( $slug, '-' ) + 1 > $max_words ) {
			$words = explode( '-', $slug );
			$slug = implode( '-', array_slice( $words, 0, $max_words ) );
		}
	}

	return $slug;
}
add_filter( 'wp_unique_post_slug', 'pm_slug_limit_words', 100, 2 );
add_filter( 'wp_unique_term_slug', 'pm_slug_limit_words', 100, 2 );
How to Remove Stop Words Automatically?
You can control which words are removed by editing the $stop_words array.
function pm_is_stop_word($word) {
	$stop_words = array(
		'a', 'an', 'and', 'are', 'as', 'at',
		'be', 'by', 'for', 'from', 'has',
		'in', 'is', 'it', 'of', 'on', 'that',
		'the', 'this', 'to', 'was', 'were',
		'will', 'with'
	);

	return in_array($word, $stop_words);
}

function pm_remove_stop_words_from_slug( $slug ) {
	// Split slug into words
	$words = explode('-', $slug);

	$filtered_words = array();
	foreach ($words as $word) {
		if (pm_is_stop_word($word)) {
			continue;
		}

		$filtered_words[] = $word;
	}

	// Handle empty slugs
	if (empty($filtered_words)) {
		return $slug;
	}

	// Rebuild and return the clean slug
	return implode('-', $filtered_words);
}
add_filter( 'wp_unique_post_slug', 'pm_remove_stop_words_from_slug' );
add_filter( 'wp_unique_term_slug', 'pm_remove_stop_words_from_slug' );
Leave a Reply